




How To Remove And Install Wall To Wall Carpet? Cost And Process
Replacing wall to wall carpet is a significant home improvement project that can transform the look and feel of a space. Over time, carpets accumulate dirt, stains, and wear, making replacement necessary for both aesthetics and hygiene. Having replaced several carpets myself, I know firsthand that the process can be challenging but rewarding. This guide will take you through the necessary preparations, removal and installation steps, and cost considerations to help you make informed decisions.
What To Prepare Before Replacing Wall To Wall Carpet?
Thorough preparation sets the foundation for a seamless carpet replacement. Before diving into the project, make sure you have all the necessary tools and safety gear to ensure a smooth, efficient, and hassle-free process.Safety Equipment
Working with carpets involves sharp tools and potential exposure to dust and allergens. Here’s a checklist of essential safety equipment:- Heavy-duty gloves to protect your hands from staples and tack strips
- Knee pads for comfort during prolonged floor work
- Dust mask to prevent inhaling accumulated particles
- Protective eyewear to shield your eyes from debris
- Long-sleeved garments safeguard your skin from irritants

Safety equipment
Necessary Tools
- Utility knife for cutting the carpet into manageable sections
- Pry bar and pliers for removing tack strips and staples
- Knee kicker and power stretcher for proper carpet installation
- Measuring tape and chalk line for precise cutting and alignment
- Staple remover for taking out old staples
- Carpet tucker for securing edges neatly
- Hammer for fixing tack strips and securing padding
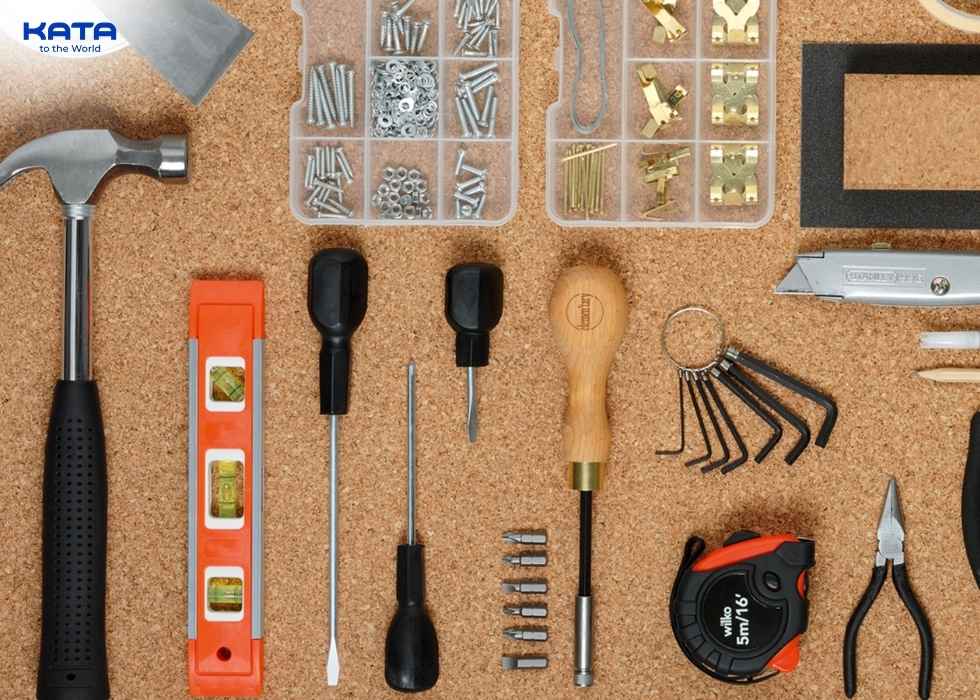
Necessary tools
How To Remove Wall To Wall Carpet?
Clear The RoomBegin by removing all furniture, including chairs, tables, and decor items. If the room contains large, heavy furniture such as sofas or beds, enlist help to move them safely. Check if the carpet extends under baseboards; if so, carefully remove or loosen them using a pry bar to make carpet removal easier. Inspect the floor for any delicate objects like cables or vent covers and remove them to prevent damage.
=>>> Discover more new articles: Best way to clean wall to wall carpet
Start at the Edges
Begin by pulling up one corner of the wall to wall carpet using pliers. Grip the carpet firmly and pull upward. If it resists, use a pry bar to wedge underneath and lift it off the tack strips. Move along the edges, loosening the carpet as you go. If the carpet is glued down, apply a carpet adhesive remover and let it sit for a few minutes to soften the glue before pulling.
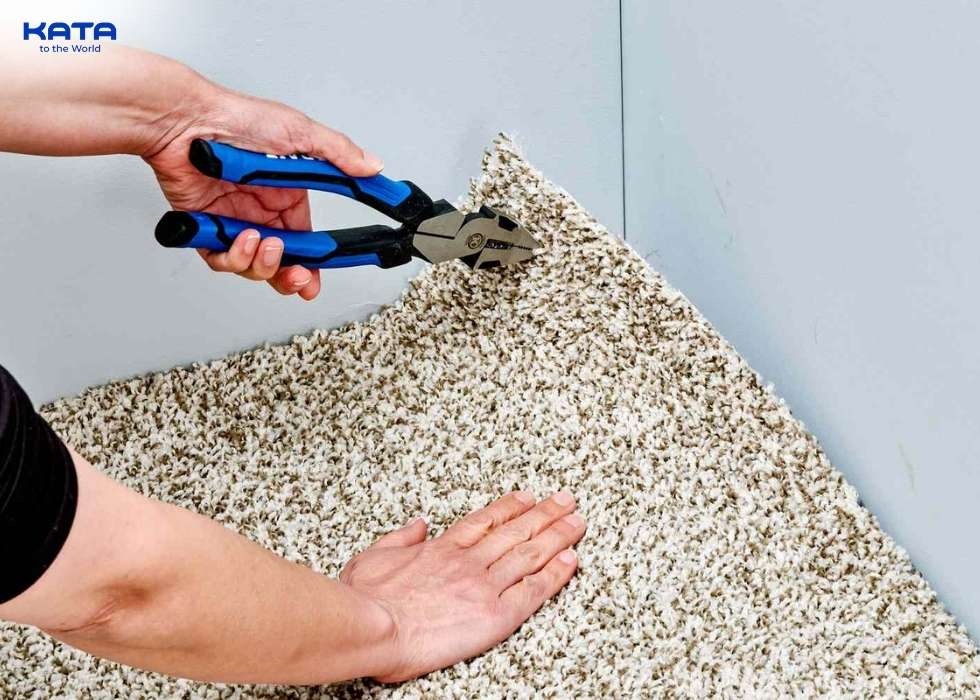
Start at the edges
Cut the Carpet Into Strips
Carpet can be unwieldy, so cutting it into smaller, manageable sections makes the removal process smoother. Using a sharp utility knife, slice through the carpet every three feet. Be sure to hold the blade at an angle and apply firm pressure to ensure a clean cut. If you’re dealing with a thick carpet, make multiple passes with the knife.
Roll and Remove
Once cut, roll each strip tightly to make it easier to handle. Secure the rolls with duct tape if needed to keep them compact. If you’re disposing of the wall to wall carpet, check local regulations on bulk waste removal, as some areas require special disposal procedures. If reusing the carpet elsewhere, keep the rolls neatly stacked.
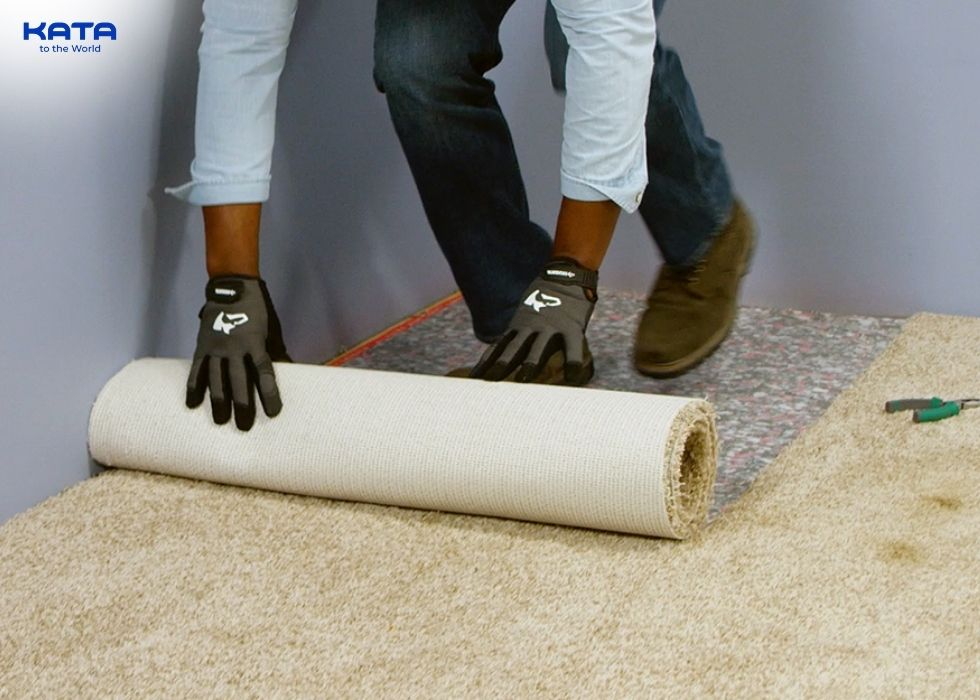
Roll and remove
Remove Carpet Padding
Carpet padding often comes in sections and may be stapled or glued down. Begin lifting the padding from one corner and roll it up in sections. If it’s stapled, use pliers or a staple remover to pull out the fasteners. For glued padding, apply a solvent to loosen the adhesive before peeling it away. Inspect the floor underneath for any remnants of padding or adhesive and scrape them off with a putty knife.
Take Out Tack Strips
Tack strips, which hold the wall to wall carpet in place, have sharp nails and should be removed carefully. Slide a pry bar underneath the strip and apply firm, controlled pressure to lift it. Move along the strip, prying it up in sections. Wear gloves to avoid injury from the sharp edges. Once removed, place the tack strips in a sturdy bag or box to prevent accidents during disposal.
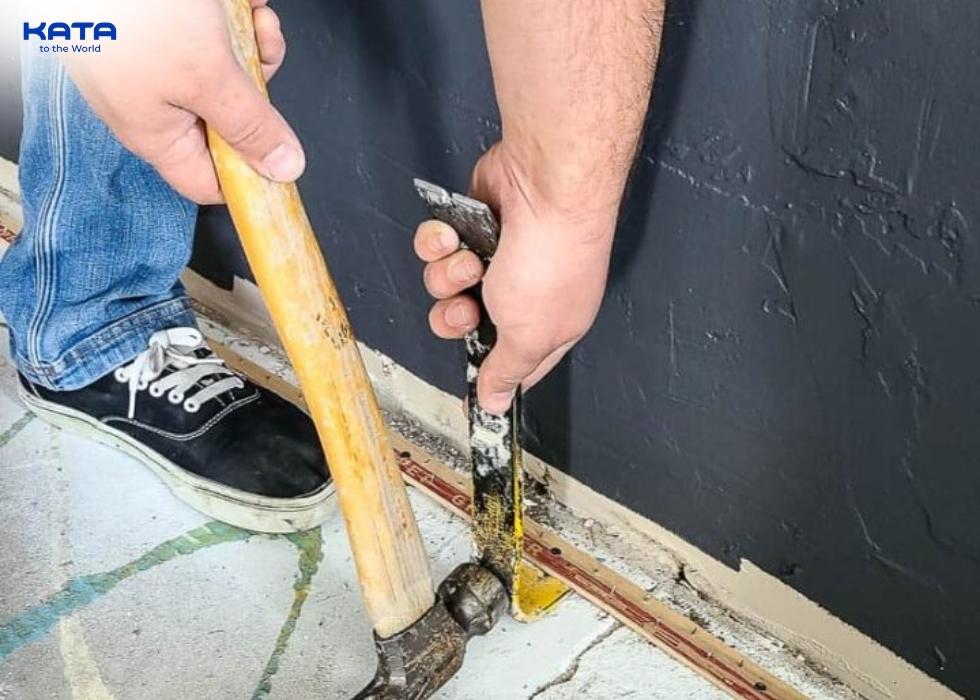
Take out tack strips
Inspect the Subfloor
With the carpet and padding removed, thoroughly inspect the subfloor. Look for cracks, water damage, or uneven areas. If there are protruding nails or staples, remove them with pliers. If you notice any squeaky floorboards, secure them with screws before proceeding. For concrete subfloors, check for moisture issues, as excess moisture can impact the new carpet installation.
Clean the Area
Before installing the new carpet, vacuum the subfloor thoroughly to remove dust, dirt, and small debris. If there is any leftover adhesive or residue, use a scraper or adhesive remover to ensure a smooth surface. A clean and even subfloor is crucial for a successful carpet installation.
=>>> Discover more new articles: Patterned wall to wall carpet

Clean the area
How To Install Wall To Wall Carpet?
Measure And Cut The CarpetBegin by measuring the entire room, noting any irregularities or obstacles. Use a chalk line to mark straight cutting lines on the back of the wall to wall carpet. When cutting, always leave an extra 2-3 inches around the edges to allow for final adjustments. If the room is large and requires seaming, ensure the carpet pieces are cut precisely and aligned with the carpet pile direction for a seamless finish.

Measure and cut the wall to wall carpet
Install Carpet Padding
If your carpet requires padding, unroll it over the subfloor, ensuring it runs perpendicular to the carpet seams for extra durability. Cut the padding to fit, leaving about half an inch around the edges to prevent overlap. Secure the padding using a heavy-duty stapler along the perimeter and at the seams, ensuring it lays completely flat without any gaps or bunching. Use adhesive tape to secure the seams for extra stability.
Lay The Wall To Wall Carpet
Unroll the carpet over the padding, ensuring it covers the entire floor space. If the carpet has been folded or rolled tightly, let it rest for several hours to allow any creases to relax. Carefully align the carpet to prevent wrinkles. If working with multiple pieces, position the seams carefully, using seam tape and a seaming iron to bond them securely.
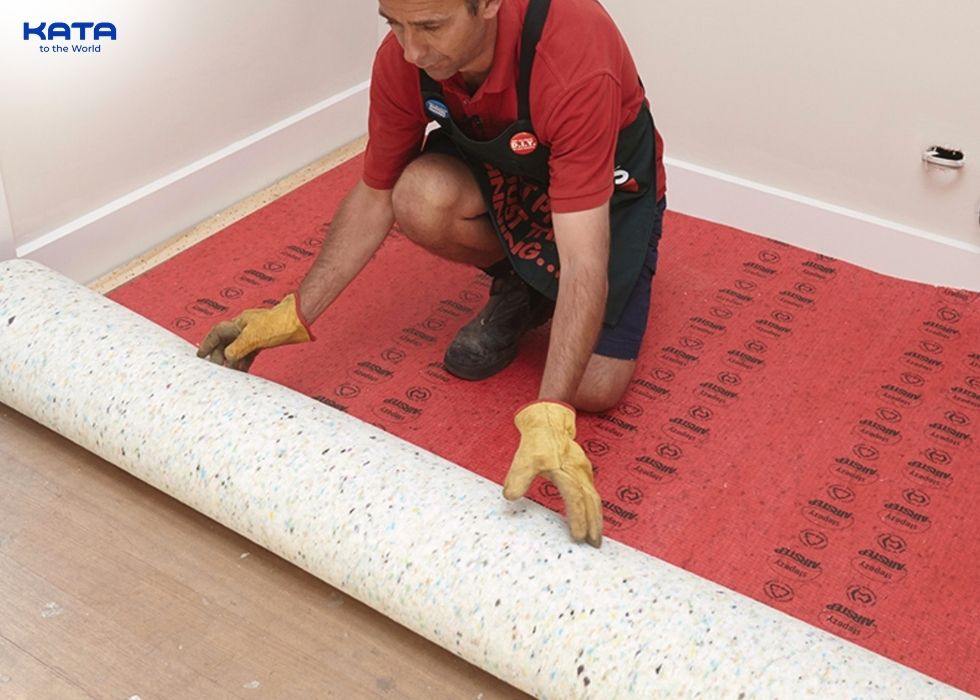
Lay the wall to wall carpet
Attach The Carpet To Tack Strips
Start securing the wall to wall carpet by anchoring one side along the longest wall. Press the carpet firmly onto the tack strips with your hands. Then, use a knee kicker to stretch the carpet toward the wall, ensuring a tight and secure fit. Work in small sections, pressing the carpet onto the tack strips as you go. Repeat this process along all walls.
Stretch The Carpet
To achieve a professional finish, use a power stretcher. Anchor one end of the stretcher against a wall and extend the wall to wall carpet toward the opposite side. Apply firm pressure, stretching the carpet evenly across the room. Move-in sections, ensuring the carpet is taut and free of wrinkles. This step is crucial to prevent bubbling or sagging over time.

Stretch the wall to wall carpet
Trim Excess Carpet
Once the carpet is stretched and secured, use a sharp utility knife to carefully trim the excess carpet along the walls, doorways, and corners. Hold the knife at a slight angle and use a straightedge or metal ruler for precision. Be cautious not to cut too much at once; instead, trim gradually to ensure a perfect fit.
=>>> Discover more new articles: Types of industrial roll carpets
Tuck In The Edges
Using a carpet tucker or putty knife, press the carpet edges under the baseboards or into transition strips where necessary. For doorways, use a carpet transition strip or threshold to secure the edge firmly in place. This step ensures a seamless and polished look.
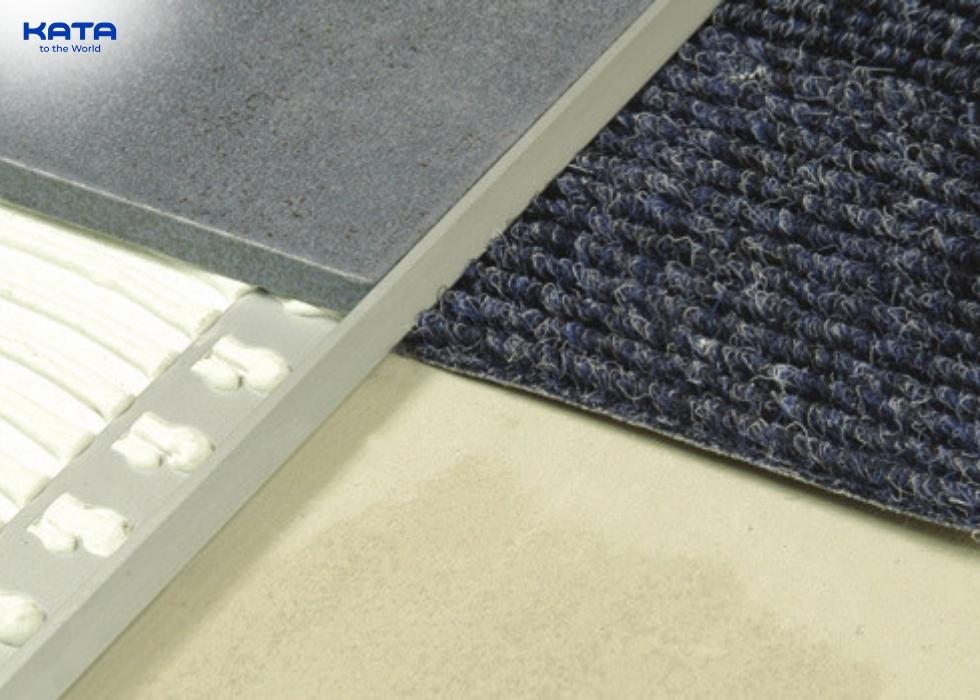
Tuck in the edges
Final Inspection And Cleanup
Walk around the room to check for any loose areas, bulges, or imperfections. If necessary, re-stretch and secure problem spots. Use a carpet roller to smooth out any seams and ensure proper adhesion. Finally, vacuum the wall to wall carpet thoroughly to remove any installation debris and enhance its appearance.
Cost To Replace Wall To Wall Carpet
The cost of replacing wall to wall carpet varies depending on the quality of materials and labor costs in your area. On average, removing and disposing of old carpet can cost between $1 to $3 per square foot if done professionally. However, doing it yourself can significantly cut costs. The price of new carpet ranges from $2 to $10 per square foot, depending on the material and brand. Padding costs an additional $0.50 to $2 per square foot, while installation charges range from $3 to $7 per square foot if hiring a professional.How Much To Install Wall To Wall Carpet?
If you choose to hire professionals, the total cost for installation alone can range from $3 to $7 per square foot. This price includes labor, carpet stretching, and securing the edges. However, if you install it yourself, you only need to pay for materials. A typical 12x12 room may cost between $500 to $2,500, depending on the carpet quality and whether you DIY or hire a professional.
Cost to replace wall to wall carpet
How Often should Wall To Wall Carpet Be Replaced?
Carpet lifespan depends on factors like material, foot traffic, and maintenance. Generally, wall to wall carpet should be replaced every 5 to 15 years. High-traffic areas like hallways and living rooms may wear out faster, requiring replacement closer to the 5- to 7-year mark. Bedrooms or low-traffic areas can last over a decade. Regular vacuuming and professional cleaning can extend the lifespan of your carpet.Other articles





COPYRIGHT 2021 © ALL RIGHT RESERVED KATAVINA


[×]
REGISTER AGENT
We will contact you as soon as possible