




How To Install Carpet On Stairs For A Professional Look
Installing carpet on stairs might seem like a daunting task, but with the right preparation and techniques, you can achieve a professional finish without hiring a contractor. Over the years, I’ve installed carpets on various staircases, and I’ve learned the best practices that ensure a flawless look while maximizing durability. In this guide, I’ll walk you through every step of the process, sharing insider tips and techniques that make the job easier and more efficient.
Preparation Before Installing Carpet On Stairs
Assessing The Staircase
Before diving into the installation process, it's crucial to assess the condition of your stairs. Check for any loose boards, creaks, or structural issues. If you find any problems, make necessary repairs to ensure a stable surface for the new carpet. Uneven surfaces can lead to poor adhesion and premature wear, so smoothing out any imperfections is key.Choosing The Right Carpet
Selecting the right carpet for stairs is essential for both aesthetics and durability. I always recommend low-pile, high-density carpets, as they provide a balance between comfort and longevity. Berber and plush carpets work well, but frieze carpet is another great option due to its twisted fibers, which help conceal dirt and footprints. Additionally, consider a carpet with a strong backing to withstand heavy foot traffic.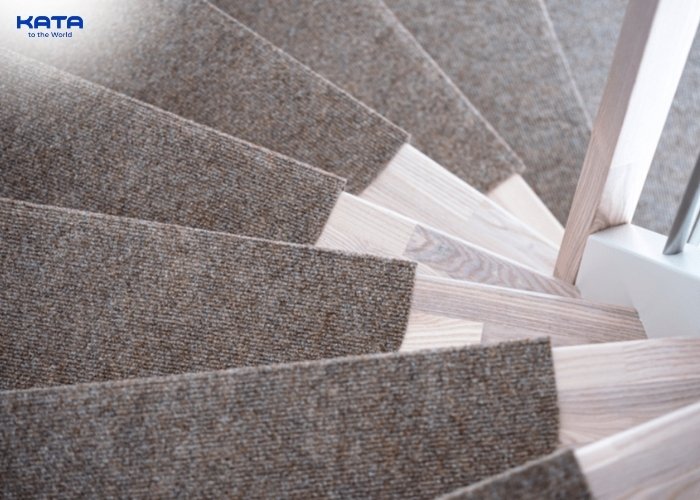
Choosing carpet for stairs
Gathering Necessary Tools And Materials
Using the proper tools ensures a seamless and efficient carpet installation process. Equipping yourself with the right materials from the start minimizes frustration and helps achieve a professional finish. Below are the essential tools and materials you'll need for the job:- Utility knife
- Measuring tape
- Knee kicker
- Stair tool
- Staple gun
- Hammer
- Tack strips
- Carpet adhesive
- High-quality carpet padding
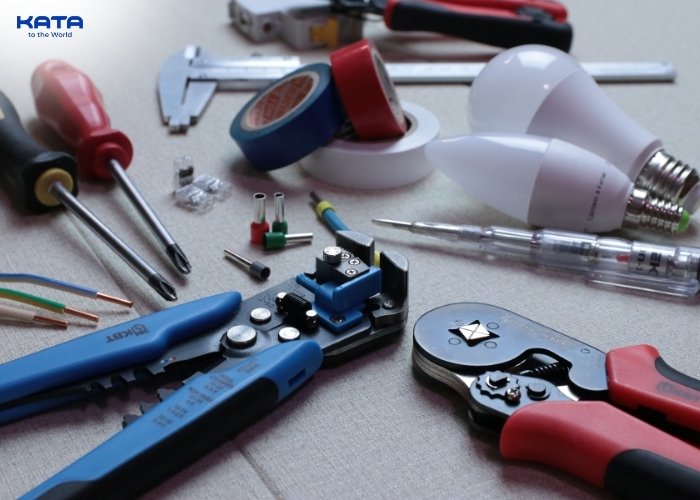
Tools and materials needed
Detailed Guide On How To Remove Old Carpet On Stairs
Step 1: Preparation: Before removing the old carpet, clear the surrounding area and wear protective gloves to prevent injury from sharp staples and tack strips.Step 2: Cut The Old Carpet: Using a utility knife, make an incision at the edges or along the middle of the stair tread to create a starting point for removal.
Step 3: Start From The Top: Always start from the top stairs and work your way down. This method prevents unnecessary strain and makes it easier to manage the removed carpet.
Step 4: Pull Out The Carpet: Firmly pull back the old carpet, loosening it from the tack strips and staples. If resistance is high, use pliers to grip and pull effectively.
Step 5: Remove The Old Carpet Padding: Once the carpet is removed, pull up the padding, which is often stapled down. Use a staple remover or pliers to extract any remaining staples.
Step 6: Remove Old Tack Strips: Use a pry bar and hammer to carefully remove old tack strips. Be cautious, as they can be sharp and may damage the underlying wood if removed improperly.
Step 7: Clean The Stair Surface: After everything is removed, vacuum and wipe down the stairs to eliminate dust and debris. A clean surface ensures better adhesion for the new carpet.
=>>> Read this now: How to remove carpet from stairs
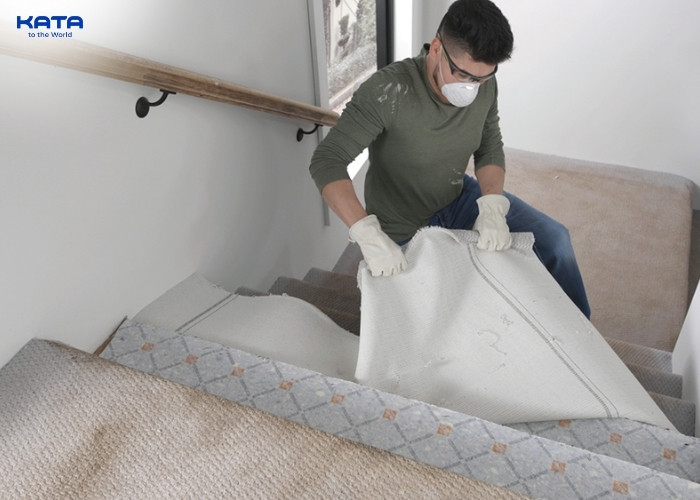
Removing carpet from stairs
Preparing The Stair Surface
With the old materials removed, thoroughly inspect the stair surface for any leftover staples, nails, or debris. Use pliers or a staple remover to extract any protruding fasteners. Sand down rough areas to create an even texture, and apply wood filler to any gaps or cracks. Allow the filler to dry completely before lightly sanding again for a smooth finish. A clean, level surface is essential for ensuring the carpet adheres securely and provides a professional look. Taking time at this stage prevents imperfections from showing through and enhances the carpet’s longevity.Detailed Step-By-Step Guide To Installing Carpet On Stairs
Cutting And Installing Carpet Padding
Before cutting the carpet padding, measure each stair tread and riser carefully to ensure accuracy. Use a sharp utility knife to cut the padding to fit each step snugly. Staple it securely in place, making sure there are no wrinkles, overlaps, or gaps. Smooth padding is crucial as it provides comfort, absorbs impact, and extends the lifespan of your carpet. Additionally, choose high-quality padding with the right thickness and density to improve durability and sound insulation. A well-installed padding layer prevents the carpet from shifting over time, reducing wear and maintaining a professional finish.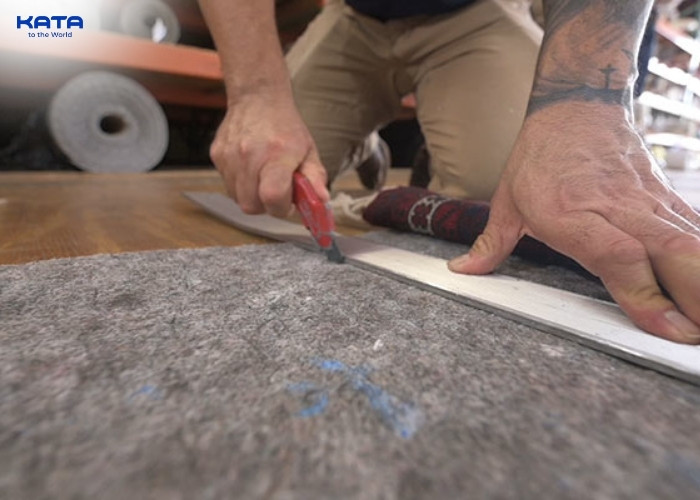
Cut and install carpet padding
Cutting The Carpet
Using a sharp utility knife, carefully measure and cut the carpet to match the exact dimensions of each stair. If opting for the waterfall method, cut long continuous strips that run from the top of each riser down to the tread. If choosing the cap-and-band method, cut separate pieces for the tread and riser to ensure a precise fit. Always leave a slight excess to allow for adjustments and trimming as needed. Keeping cuts straight and accurate is essential for a polished, professional appearance once installed.Installing Carpet On The Steps
How To Use Tack Strips - Common MethodPosition tack strips along the edges of each stair tread and riser, leaving about a half-inch gap from the edge. Secure them firmly with nails or screws to ensure they stay in place. Stretch the carpet tightly using a knee kicker, starting from the center and working outward to eliminate any wrinkles or slack. Press the carpet into the tack strips firmly to create a secure grip. Use a stair tool to tuck in the edges neatly along the sides and corners, ensuring a smooth and professional appearance. Double-check each step for tightness and make any necessary adjustments before moving on.

Use adhesive strips to install carpet on stairs
For those who prefer not to use tack strips, adhesive and staples are excellent alternatives. Double-sided carpet tape provides a secure hold without damaging the floor, making it ideal for temporary installations. Full adhesive bonding ensures a firm grip, but it requires careful application to prevent bubbling and uneven surfaces. Stapling the carpet along the edges and under the nosing is another effective method, especially for high-traffic areas. When using adhesives, work in small sections to maintain control and achieve a smooth, wrinkle-free finish. Properly securing the carpet without tack strips demands extra precision but can yield equally professional results.
=>>> Read this now: How to measure stairs for carpet
Installing Carpet On The Landing
For landings, measure the area carefully and cut a single piece of carpet slightly larger than the space to allow for adjustments. Secure it firmly using tack strips along the edges or a high-strength adhesive for a seamless, long-lasting fit. Pay special attention to alignment with the stairs, ensuring the pattern or pile direction remains consistent. Smooth out any wrinkles or bubbles before pressing the carpet into place. If using tack strips, stretch the carpet slightly with a knee kicker for a snug fit. Proper installation on the landing enhances durability and contributes to a cohesive, professional finish.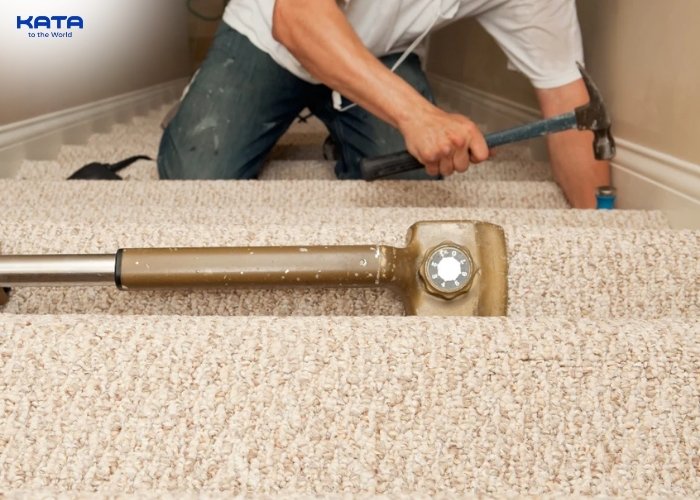
Installing carpet on the landing
Finishing And Inspection
Once the carpet is installed, carefully inspect each step for loose edges, wrinkles, or uneven tension. Walk up and down the stairs to check for any shifting or bubbling. Use a stair tool to tuck in any loose sections along the edges, ensuring a snug fit against the risers and treads. If necessary, secure the carpet further with a staple gun, focusing on areas prone to movement or wear. Trim any excess material with a sharp utility knife for a polished finish. A final thorough check guarantees a secure and professional-looking installation that will last for years.Tips And Considerations When Installing Stair Carpet
- Choose the Right Carpet: Opt for durable, low-pile options like Berber or cut-pile nylon. Avoid plush or shag carpets that wear quickly and pose tripping hazards.
- Use Firm Padding: A ⅜-inch thick, 8-pound density padding ensures stability and longevity.
- Measure and Cut Precisely: Each step may differ; use a sharp utility knife for clean edges.
- Secure the Carpet Well: Tack strips, staples, or adhesives prevent movement and enhance safety.
- Improve Safety: Choose textured carpets or add stair runners and non-slip underlays.
- Hire a Pro if Needed: Professional installation ensures precision and durability.

Stair carpet installation tips
Cost To Install Carpet On Stairs
The cost of installing carpet on stairs varies depending on the type of carpet, padding, and labor involved. On average, homeowners can expect to pay between $3 to $10 per square foot for materials and installation. High-end carpets and custom installations can increase costs. DIY installation can save money, but professional installation ensures optimal results.How Long To Install Carpets On Stairs?
Installing carpet on stairs generally takes 4 to 8 hours for DIYers and 2 to 4 hours for professionals. The time required depends on factors such as staircase complexity, carpet type, and installation method. Straight stairs are easier and faster to cover, while curved or landing stairs require more precision and effort. Proper preparation, including accurate measurements and having the right tools, ensures a smooth, durable installation. Taking the time to secure the carpet correctly helps prevent shifting and extends its lifespan.Other articles



COPYRIGHT 2021 © ALL RIGHT RESERVED KATAVINA


[×]
REGISTER AGENT
We will contact you as soon as possible