




Save on Flooring Costs with This DIY Carpet Installation Guide
Want to give your floors a fresh, cozy makeover without breaking the bank? DIY carpet installation is an affordable and rewarding way to transform your space. With the right tools, materials, and techniques, you can achieve a professional look on your own. This guide will walk you through the process step by step, ensuring your carpet project succeeds from start to finish.
Tools and Materials for DIY Carpet Installation
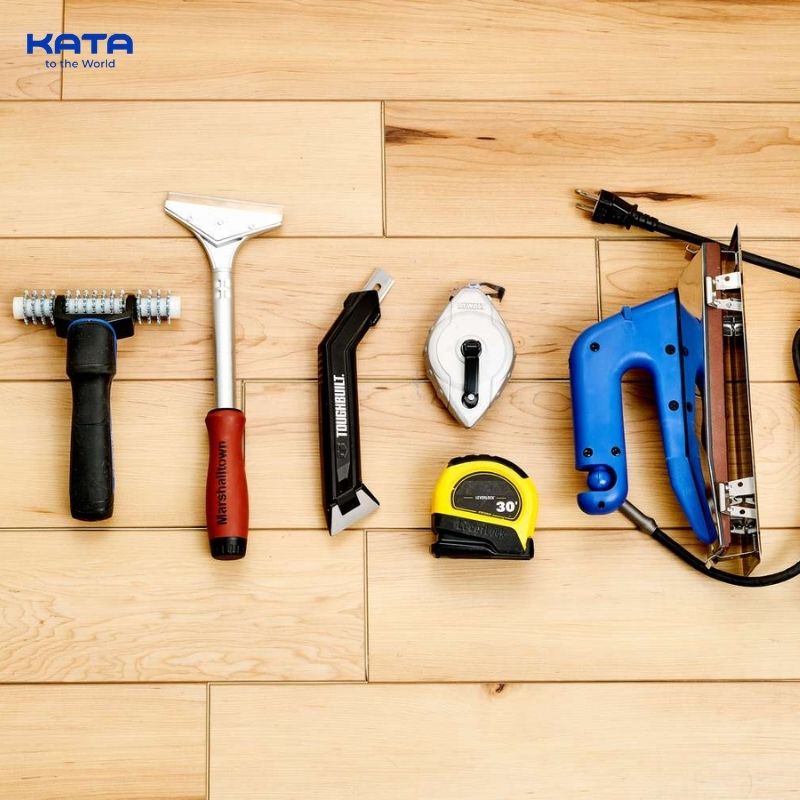
Embarking on a DIY carpet installation project requires having the right tools and materials on hand. Here is everything you need to achieve professional results:Carpet and Carpet Pad
The foundation of any carpet installation is, of course, the carpet itself and the carpet pad. The carpet pad acts as a cushion beneath the carpet, providing comfort underfoot and extending the lifespan of your flooring. Be sure to select a carpet and pad combination suitable for your room’s needs for example, a thicker pad for bedrooms and a denser one for high-traffic areas.Tack Strips, Knee Kicker, and Carpet Stretcher
Tack strips are narrow wooden strips with sharp tacks used to secure the edges of the carpet to the subfloor. A knee kicker is an essential tool for stretching the carpet into place along walls and corners, ensuring a snug fit. For larger rooms, a power carpet stretcher can help eliminate wrinkles and create a seamless finish.Utility Knife, Measuring Tape, and Chalk Line
Precision is key in carpet installation. A utility knife is necessary for cutting the carpet and pad to size, while a measuring tape ensures accurate measurements. A chalk line is useful for marking straight lines and aligning your carpet with the room’s layout.=>>> Learn more: how to install carpet on concrete
Adhesives or Staples (If Required)
Depending on the type of carpet and subfloor, you may need adhesives or staples to secure the padding or the carpet itself. Some carpets require adhesive along the seams or edges to prevent movement.By gathering all these tools and materials beforehand, you can set yourself up for a smooth and efficient carpet installation process.
Proper preparation is the foundation of a successful DIY carpet installation. Taking the time to prepare your space ensures that the new carpet will lay evenly and look flawless.
Remove Old Flooring or Carpet
Begin by removing any existing carpet, padding, or flooring. Use a utility knife to cut the old carpet into manageable strips, then pull it up from the tack strips. Be sure to remove all staples, nails, and adhesive residue left behind. Dispose of the old materials responsibly.Clean and Level the Subfloor
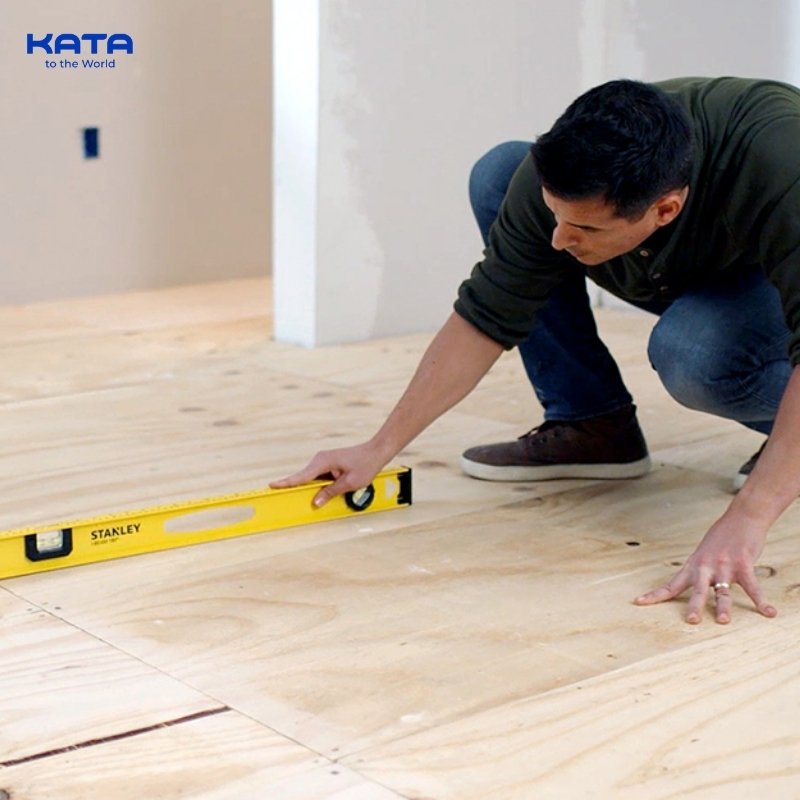
A clean and level subfloor is essential for a smooth carpet installation. Sweep and vacuum the subfloor to remove dirt and debris. Inspect the surface for imperfections such as cracks, dips, or raised areas. Use a leveling compound to fill in any uneven spots, and sand down any high areas.=>>> Learn more: How to dispose of old carpet
Measure Your Space Accurately
Accurate measurements are crucial to avoid waste and ensure a proper fit. Use a measuring tape to determine the length and width of your room, accounting for doorways and alcoves. Add a few extra inches to your measurements to allow for trimming.Cut the Carpet and Padding to Fit
Roll out your carpet and padding in a clean, open area. Use a utility knife to cut them to the dimensions of your room, leaving a few extra inches on all sides. Cutting the materials beforehand makes the installation process quicker and more efficient.Installing the Carpet
Now that your space is prepared and materials are ready, it’s time to start the installation process. Follow these steps to lay your carpet like a pro:Secure Tack Strips Along the Room’s Perimeter
Install tack strips around the edges of the room, leaving a small gap (about the thickness of the carpet) between the strips and the wall. Ensure the tacks are angled toward the wall to grip the carpet effectively. To prevent discomfort, avoid placing tack strips in doorways.Lay and Secure the Carpet Pad
Roll out the carpet pad over the subfloor, ensuring it covers the entire surface without overlapping. Secure the pad to the subfloor using a staple gun or adhesive, paying special attention to the edges and seams. Trim any excess padding along the edges of the tack strips.=>>> Learn more: 6 easy ways to replace carpet with expert tips and tricks

Stretch and Attach the Carpet to Tack Strips
Begin by laying the carpet over the padding, ensuring it extends a few inches up the walls. Use a knee kicker to stretch the carpet onto the tack strips along one wall. Continue stretching and attaching the carpet along the opposite wall, working your way around the room for a snug fit.Seam and Trim the Edges for a Neat Finish
If your carpet requires seaming, use carpet seaming tape and a seaming iron to join the edges. Trim any excess carpet along the walls with a utility knife, leaving just enough to tuck under the baseboards. Tuck the edges neatly using a stair tool or putty knife for a polished look.Common Challenges and How to Overcome Them
While installing carpet yourself can be rewarding, you may encounter some challenges along the way. Here’s how to tackle common issues:Dealing with Wrinkles or Uneven Stretching
Wrinkles or loose areas can ruin the appearance of your carpet. To fix this, use a carpet stretcher to pull the carpet taut and eliminate wrinkles. Start from the center of the room and work outward toward the walls.Ensuring Proper Alignment and Pattern Matching
If your carpet has a pattern, aligning it correctly can be tricky. Take your time to position the carpet before securing it, and double-check the alignment at every step. Use a chalk line to mark straight lines as a guide.Fixing Minor Mistakes During Installation
Mistakes happen, even to seasoned DIYers. If you accidentally cut the carpet too short, use a patch of matching carpet to fill the gap. For small gaps along the edges, tucking the carpet under the baseboards can help conceal them.
Maintenance Tips for Your Newly Installed Carpet
Congratulations on successfully installing your carpet! To keep it looking fresh and beautiful for years to come, follow these maintenance tips:Regular Vacuuming to Keep It Clean and Fresh
Vacuum your carpet regularly to remove dirt, dust, and debris that can accumulate over time. For high-traffic areas, consider vacuuming twice a week to prevent wear and tear.Addressing Spills Promptly to Prevent Stains
Spills are inevitable, but addressing them quickly can prevent permanent stains. Blot spills with a clean cloth and use a carpet cleaner designed for your carpet type. Avoid scrubbing, as this can damage the fibers.Professional Cleaning Recommendations for Longevity
While regular vacuuming and spot cleaning are essential, professional cleaning can help maintain your carpet’s appearance and extend its lifespan. Schedule professional cleanings every 12-18 months, or more frequently for high-traffic areas.By following these maintenance tips, you can enjoy your newly installed carpet for years to come.
DIY carpet installation is a cost-effective and rewarding way to enhance your home. With the right tools, careful preparation, and attention to detail, you can achieve a professional-looking finish that transforms your space. Remember to take your time, address challenges as they arise, and follow proper maintenance practices to keep your carpet looking its best. Happy installing!
Other articles



COPYRIGHT 2021 © ALL RIGHT RESERVED KATAVINA


[×]
REGISTER AGENT
We will contact you as soon as possible